Download: https://hermes-agent.nousresearch.com/
1. Configuration Steps
Step 1: Open Custom Endpoints
Go to Providers → Custom Endpoints in the left menu, then click New endpoint at the bottom to create one.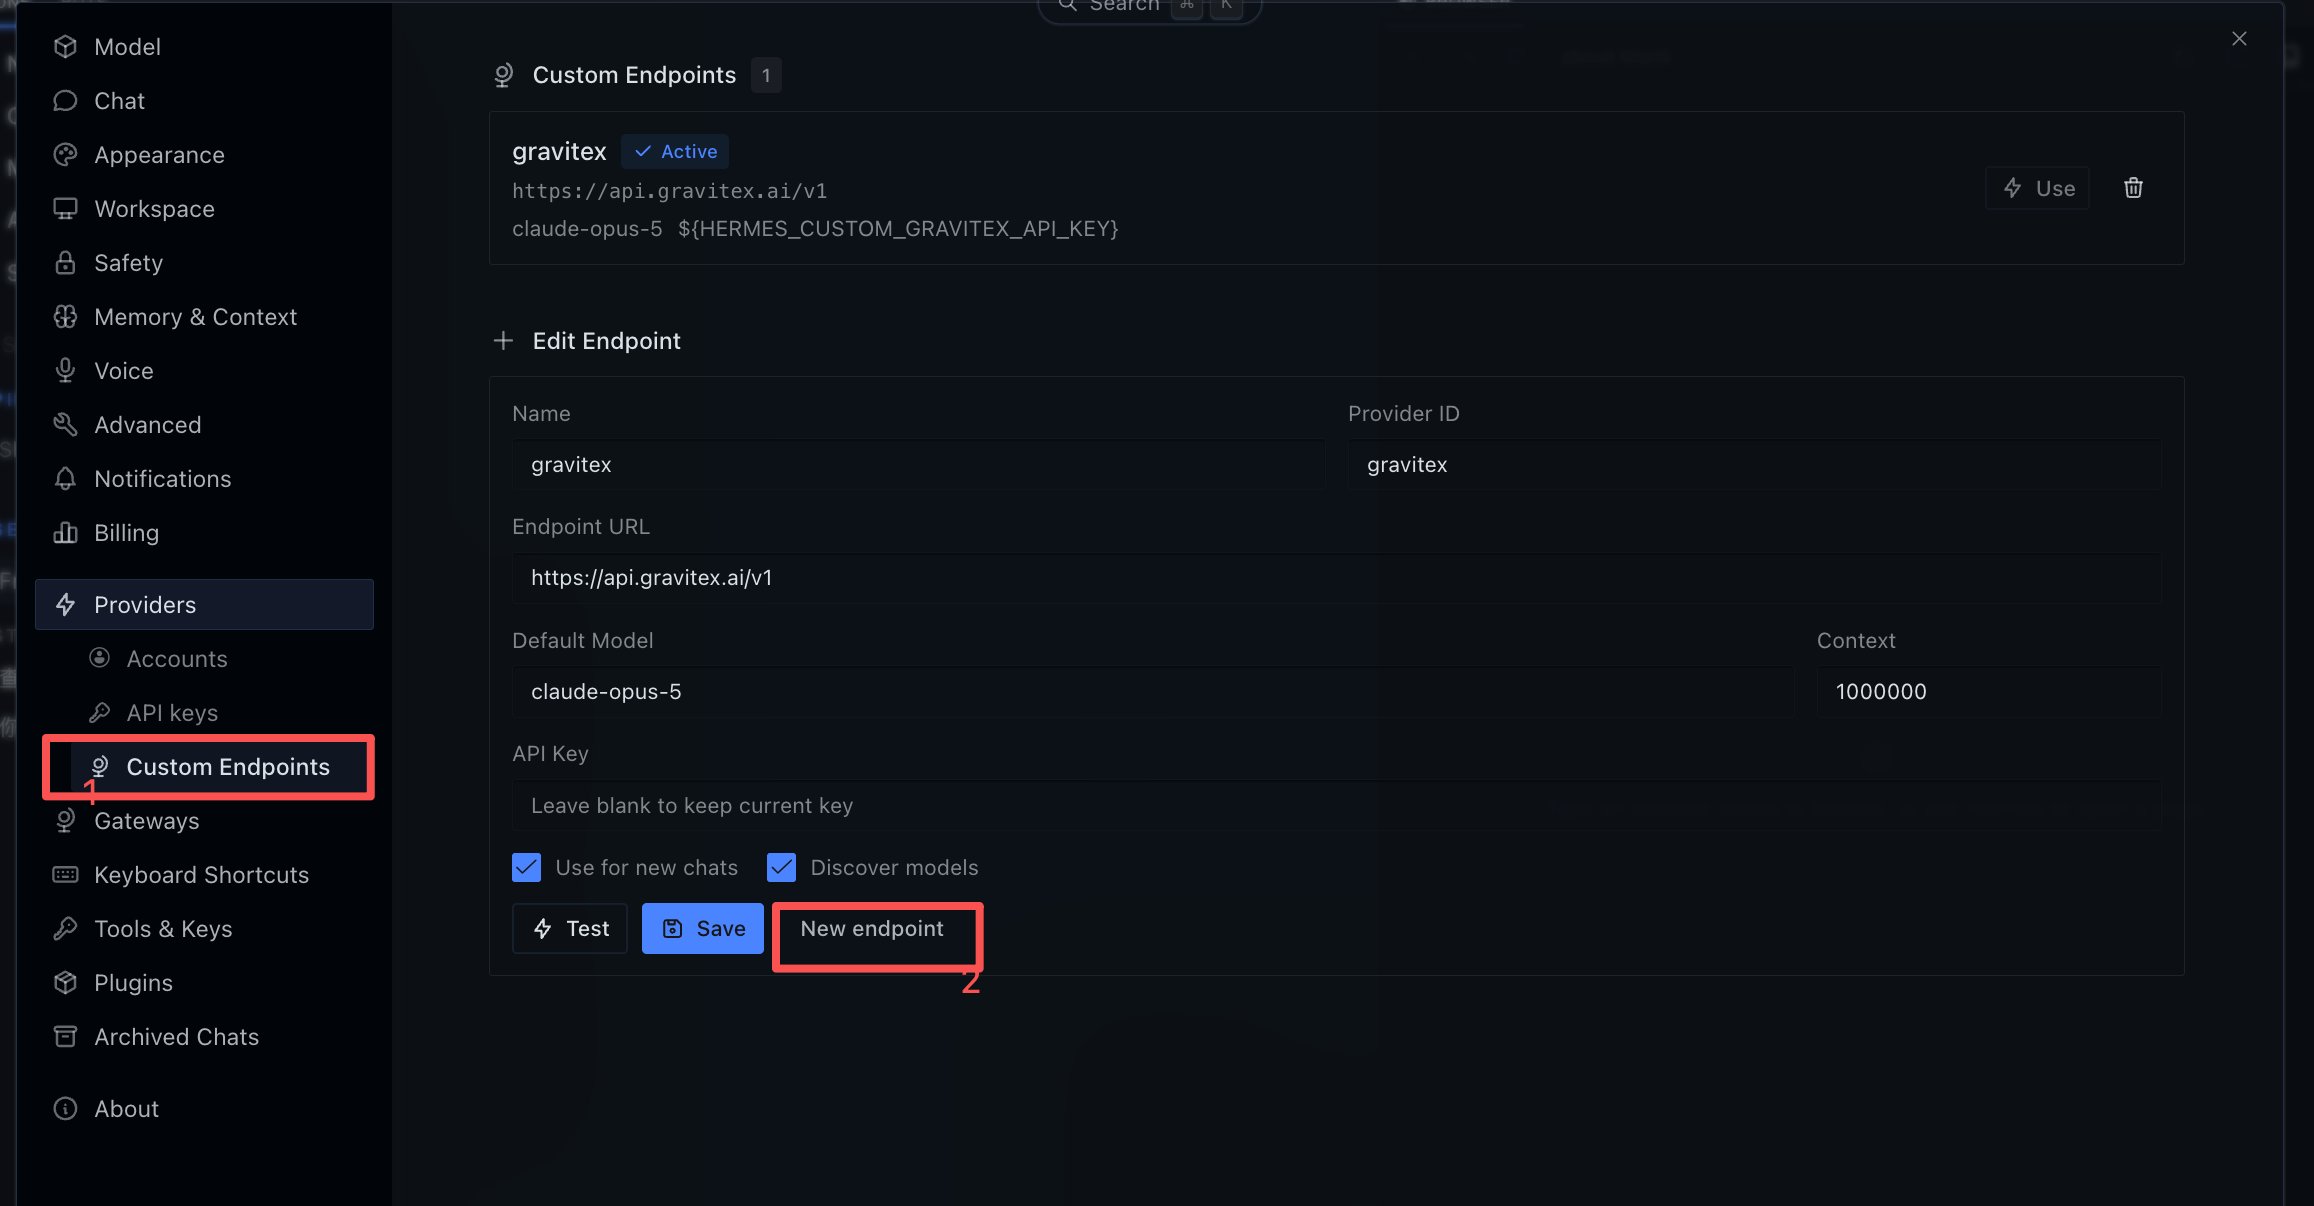
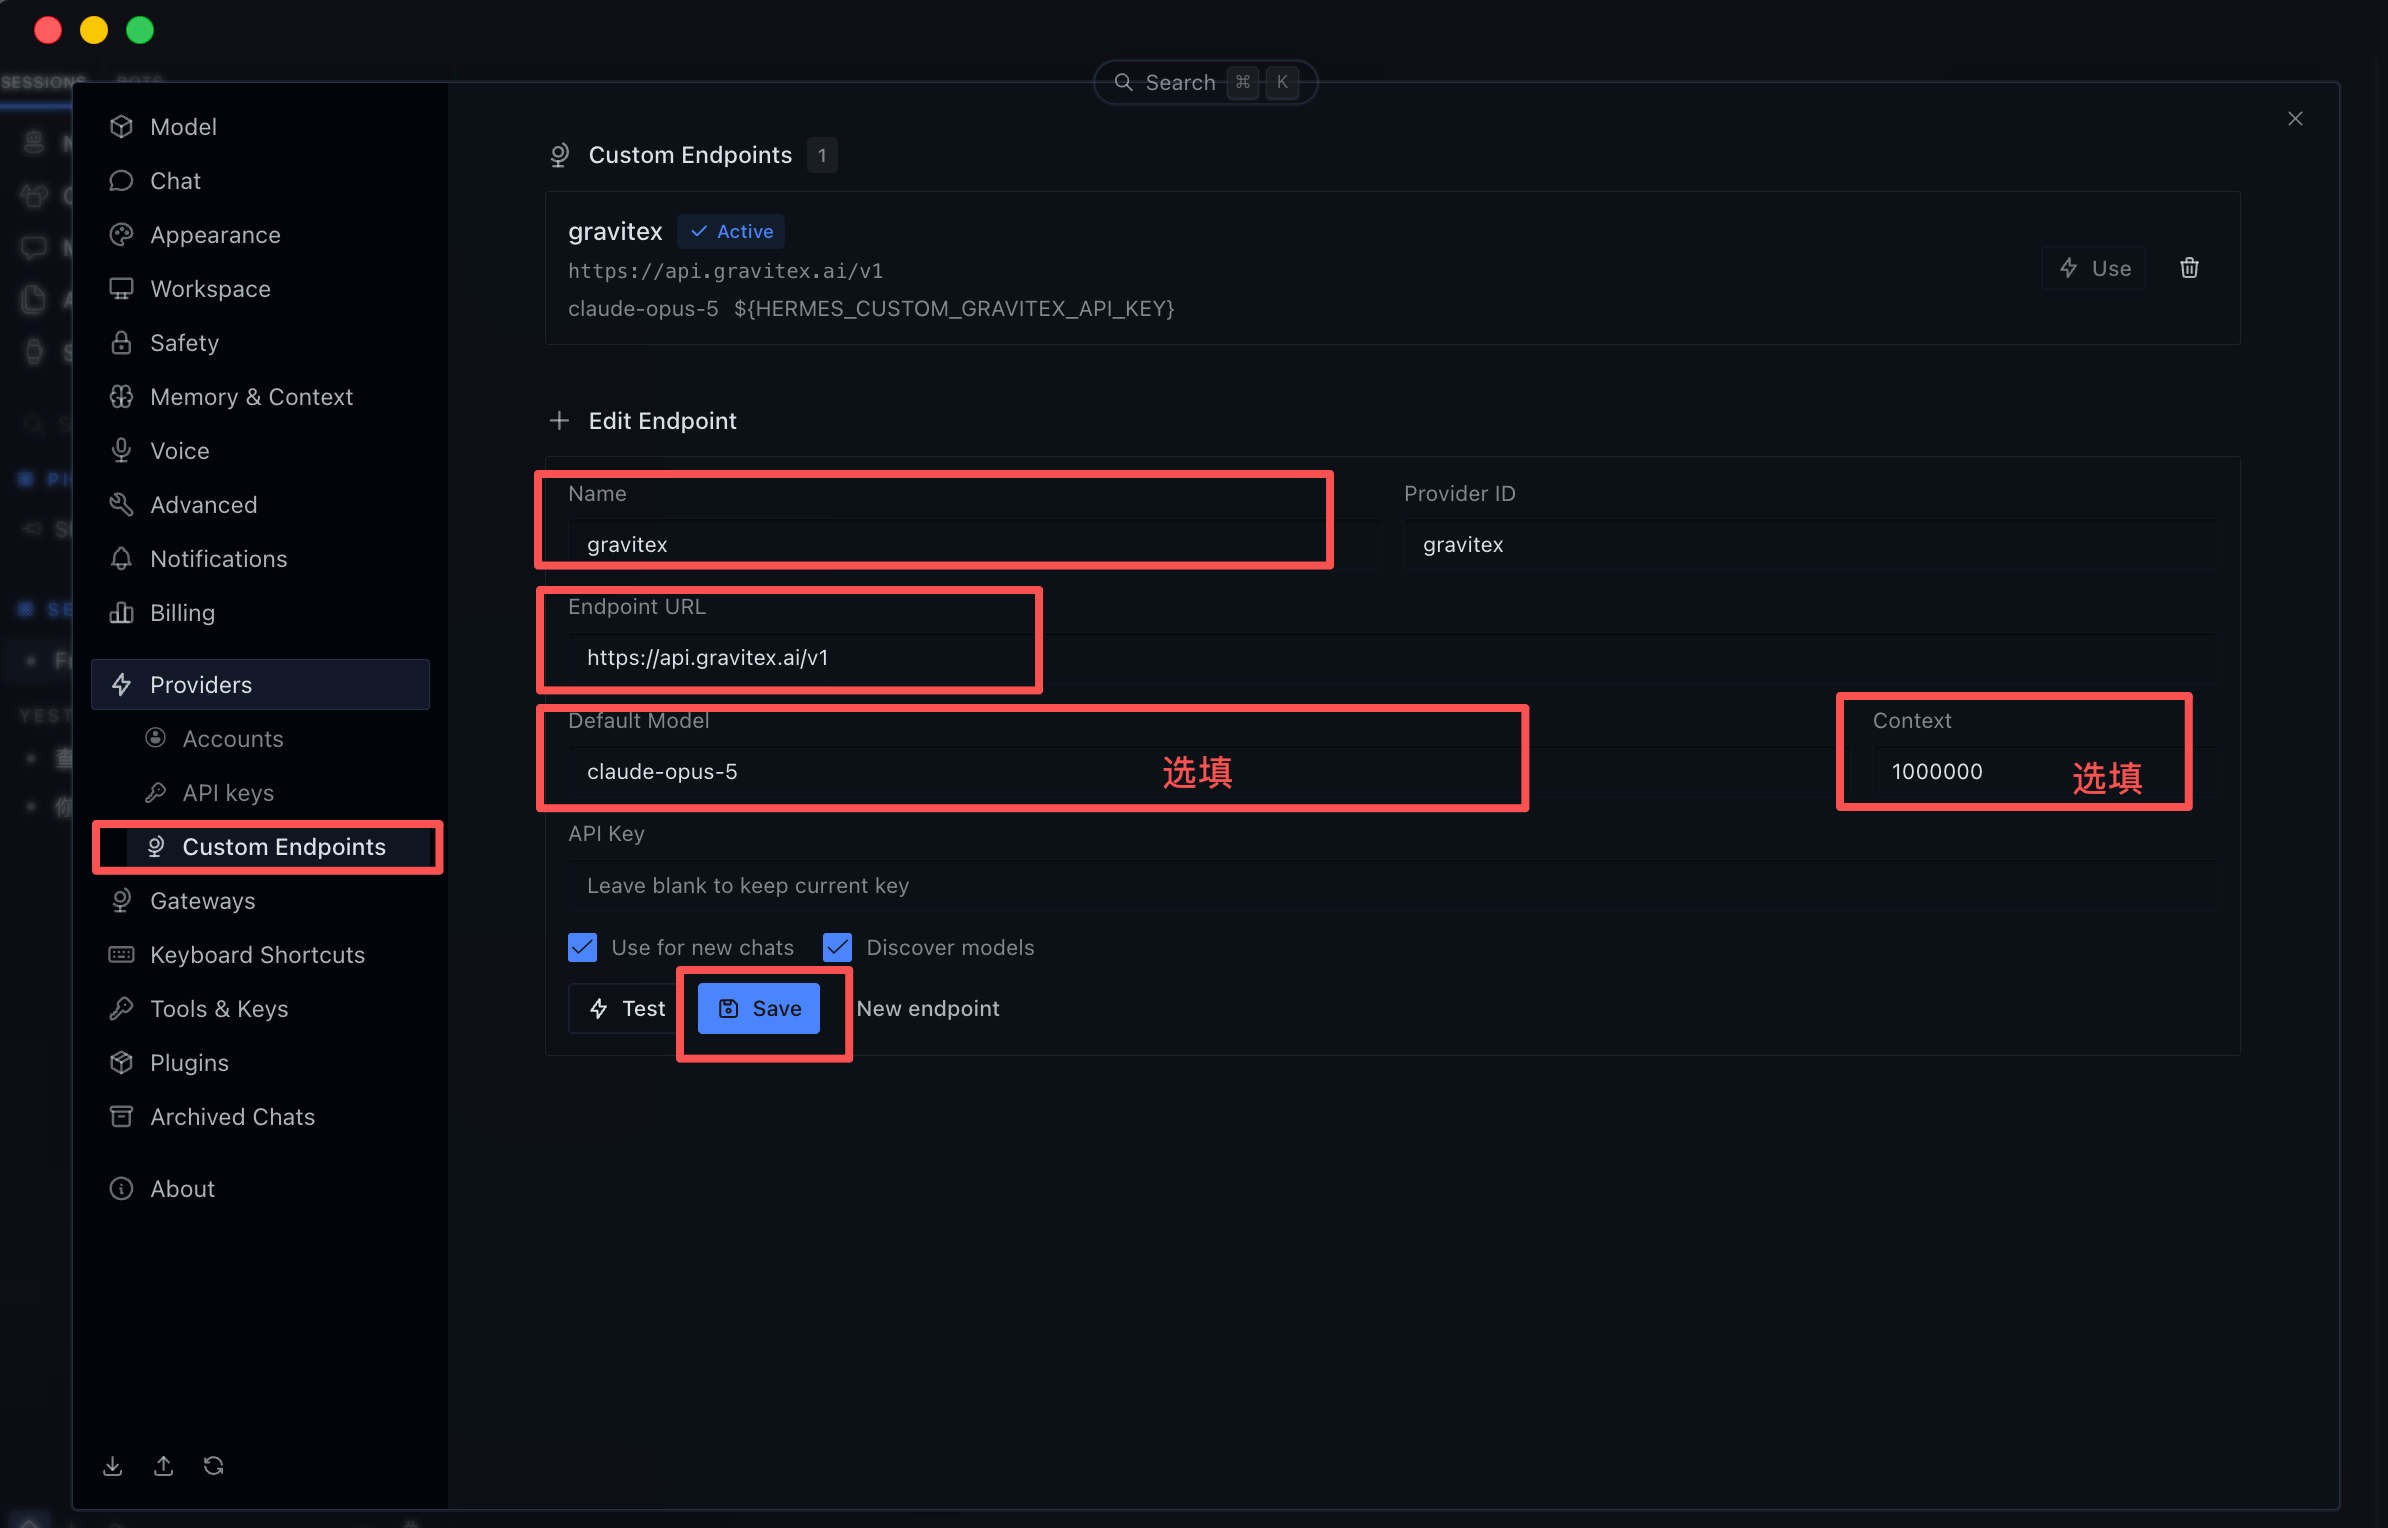
Step 2: Fill in Gravitex Gateway Information
In the Edit Endpoint form, fill in the following:
Check Use for new chats and Discover models, click Test to confirm connectivity, then click Save to save.
Step 3: Confirm Gateway Connection Mode
Go to Gateways in the left menu and check Connection mode. The default is Local gateway (runs locally, supports offline). You generally do not need to change this for Gravitex integration; only switch to Hermes Cloud / Remote gateway / Connect via SSH when you need the Hermes backend to run remotely or in the cloud.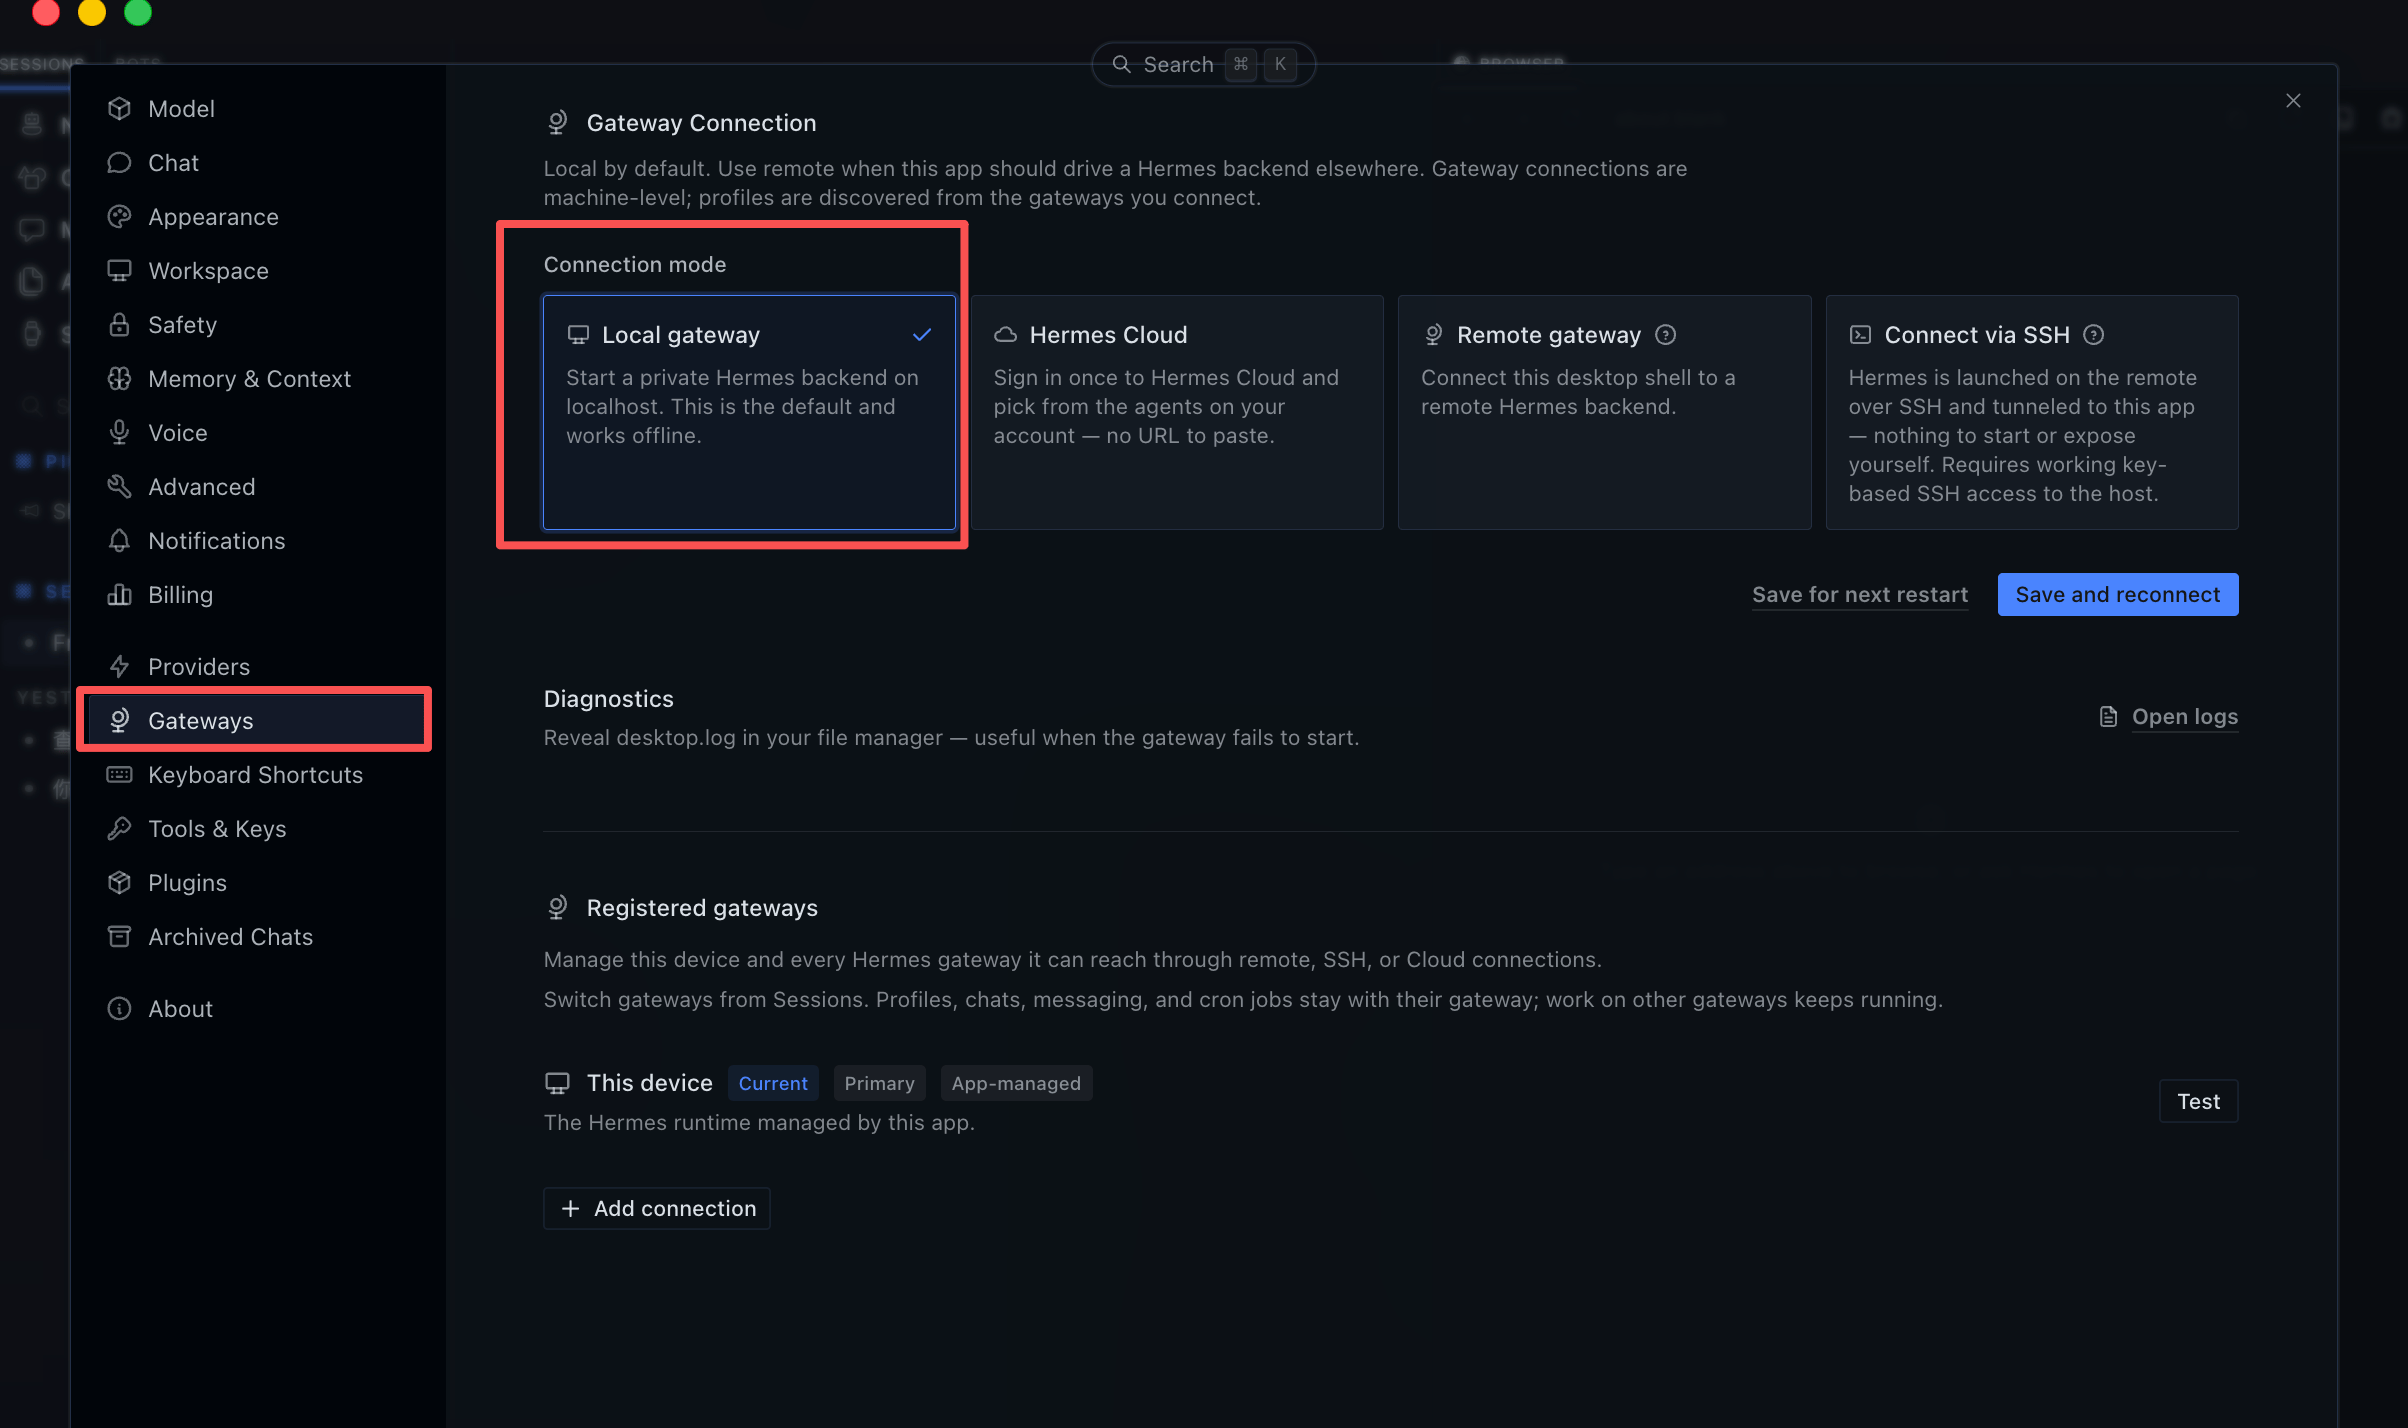
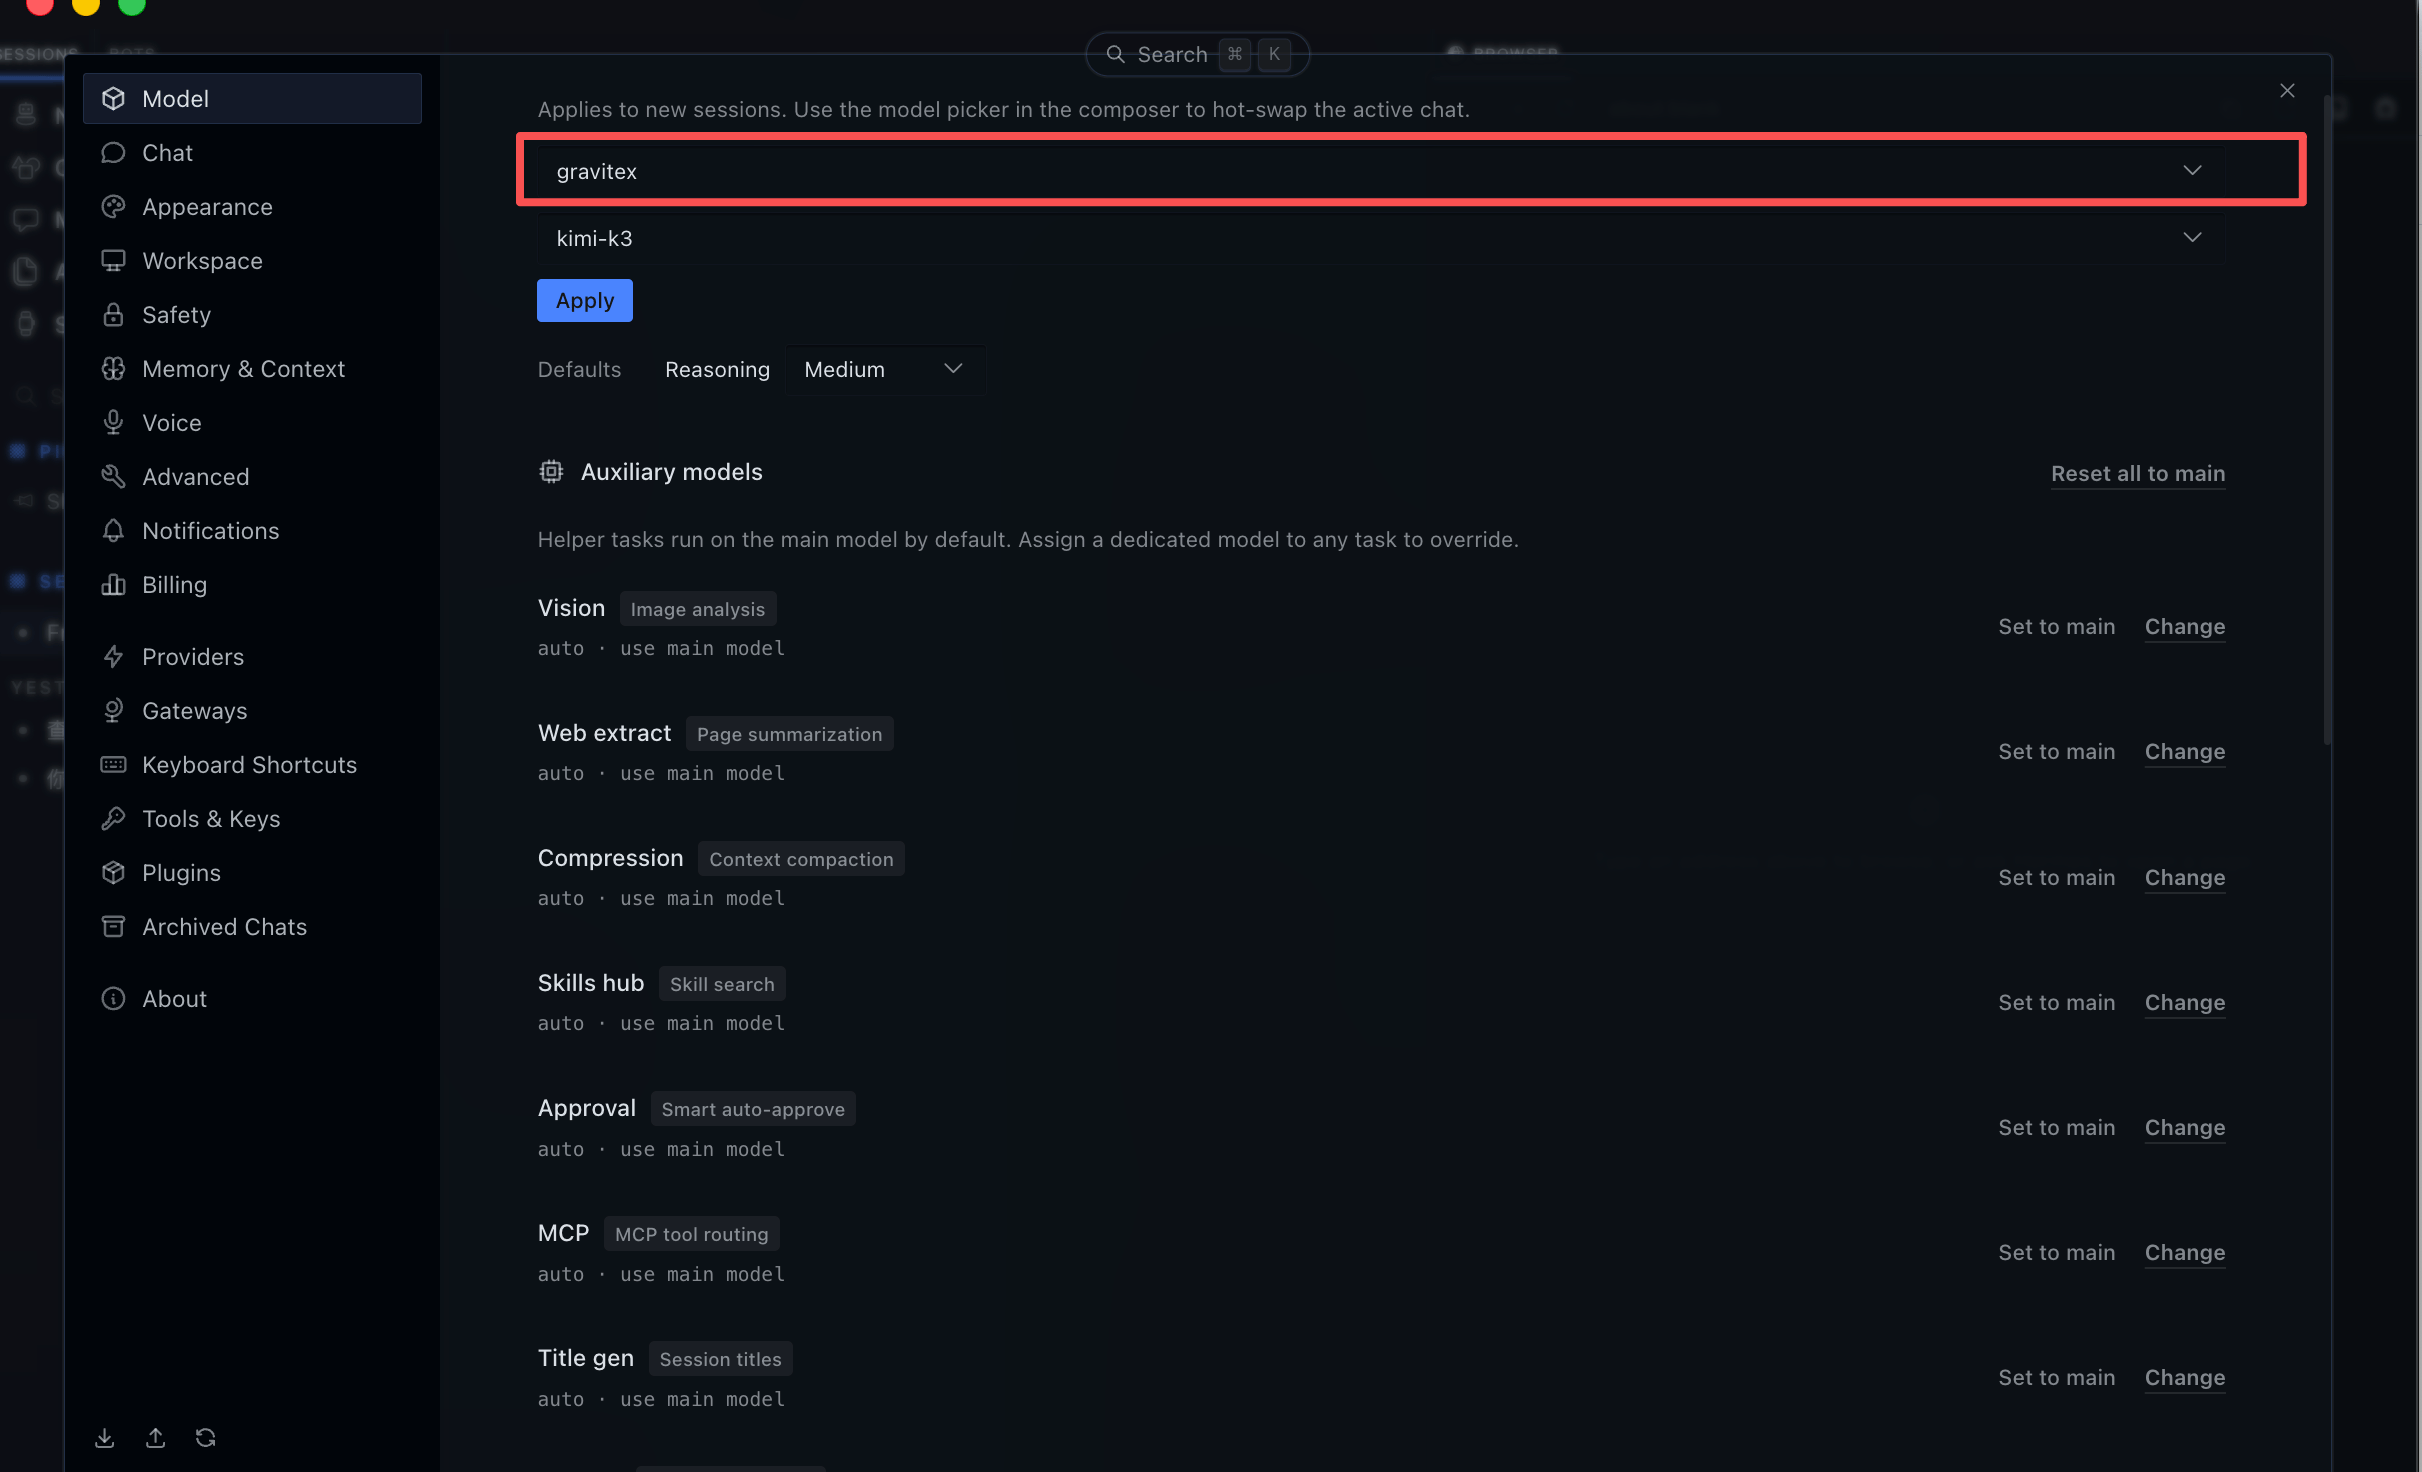
Step 4: Select gravitex in Model
Go to Model in the left menu, selectgravitex (configured in Step 2) from the model dropdown, and click Apply. To assign separate models for auxiliary tasks such as Vision, Web extract, Compression, Skills hub, Approval, MCP, Title gen, etc., click Change next to each item under Auxiliary models; by default they all follow the main model (auto · use main model).
Step 5: Send a Test Message
Go back to the Chat page and send a message to confirm you can receive a normal response from the gravitex gateway.2. Verify Success
gravitexis visible and can be successfully selected in the Model selector, with no errors after clicking Apply.- Messages sent in Chat receive normal replies without
invalid api key/endpoint unavailable/model_not_founderrors.
3. Troubleshooting
4. Security Notes
- API Key is equivalent to a password — do not include it in public documentation, chat records, screenshots, or code repositories.
- Custom Endpoint details may display key information in the form of environment variables (e.g.,
${HERMES_CUSTOM_GRAVITEX_API_KEY}). Do not share screenshots in public environments. - If your key has been leaked in chats, logs, or screenshots, immediately revoke and regenerate it in the Gravitex console.