
1. Overview
DeepSeek Harness (CLI commanddsh) is DeepSeek’s official open-source agent harness, positioned as “Model + Harness = Agent” — it ships no models of its own; instead it gives a large model the “hands” to operate files, terminals, the web, and external services, so the model can decompose tasks, read files, edit code, run commands, and deliver results autonomously in your workspace. Built on an “everything-is-a-plugin” architecture, the model is just one replaceable capability, so any OpenAI-compatible or Anthropic-compatible model service can be plugged in.
DeepSeek Harness offers a Web UI (default http://127.0.0.1:3080), a CLI, and an SDK. With GravitexAI you get:
2. Requirements
- Node.js installed (LTS recommended)
- macOS / Linux / Windows; the Web UI is accessed from a browser
3. Prerequisites
- Node.js installed on your machine
- An API key (format
sk-xxxxxxxxxx) created in the GravitexAI Console
4. Quick Start
Step 1: Install and launch DeepSeek Harness
No global install needed — start the Web UI vianpx:
http://127.0.0.1:3080 and opens it in your browser; pass --no-open to skip opening the browser. Config and data are stored in the $DSH_HOME directory by default (~/.dsh/ on macOS/Linux, %USERPROFILE%\.dsh\ on Windows).
Step 2: Get a GravitexAI API Key
- Open the GravitexAI Console
- Click “Create Token”, name it, and save
- Copy the key starting with
sk-
Step 3: Add a custom provider
In the Web UI, go to Settings → Models, choose Add a custom provider, and fill in:Each provider uses exactly one protocol. OpenAI-family models (e.g.
gpt-5.5) must use the openai-responses protocol, while models such as DeepSeek, Gemini, and Kimi use openai-completions. For Claude-family models, the Anthropic-native protocol (anthropic-messages) is recommended, with Base URL https://api.gravitex.ai (no /v1). Create one provider per protocol (e.g. gravitex, gravitex-openai, gravitex-anthropic; see “Advanced Configuration” below).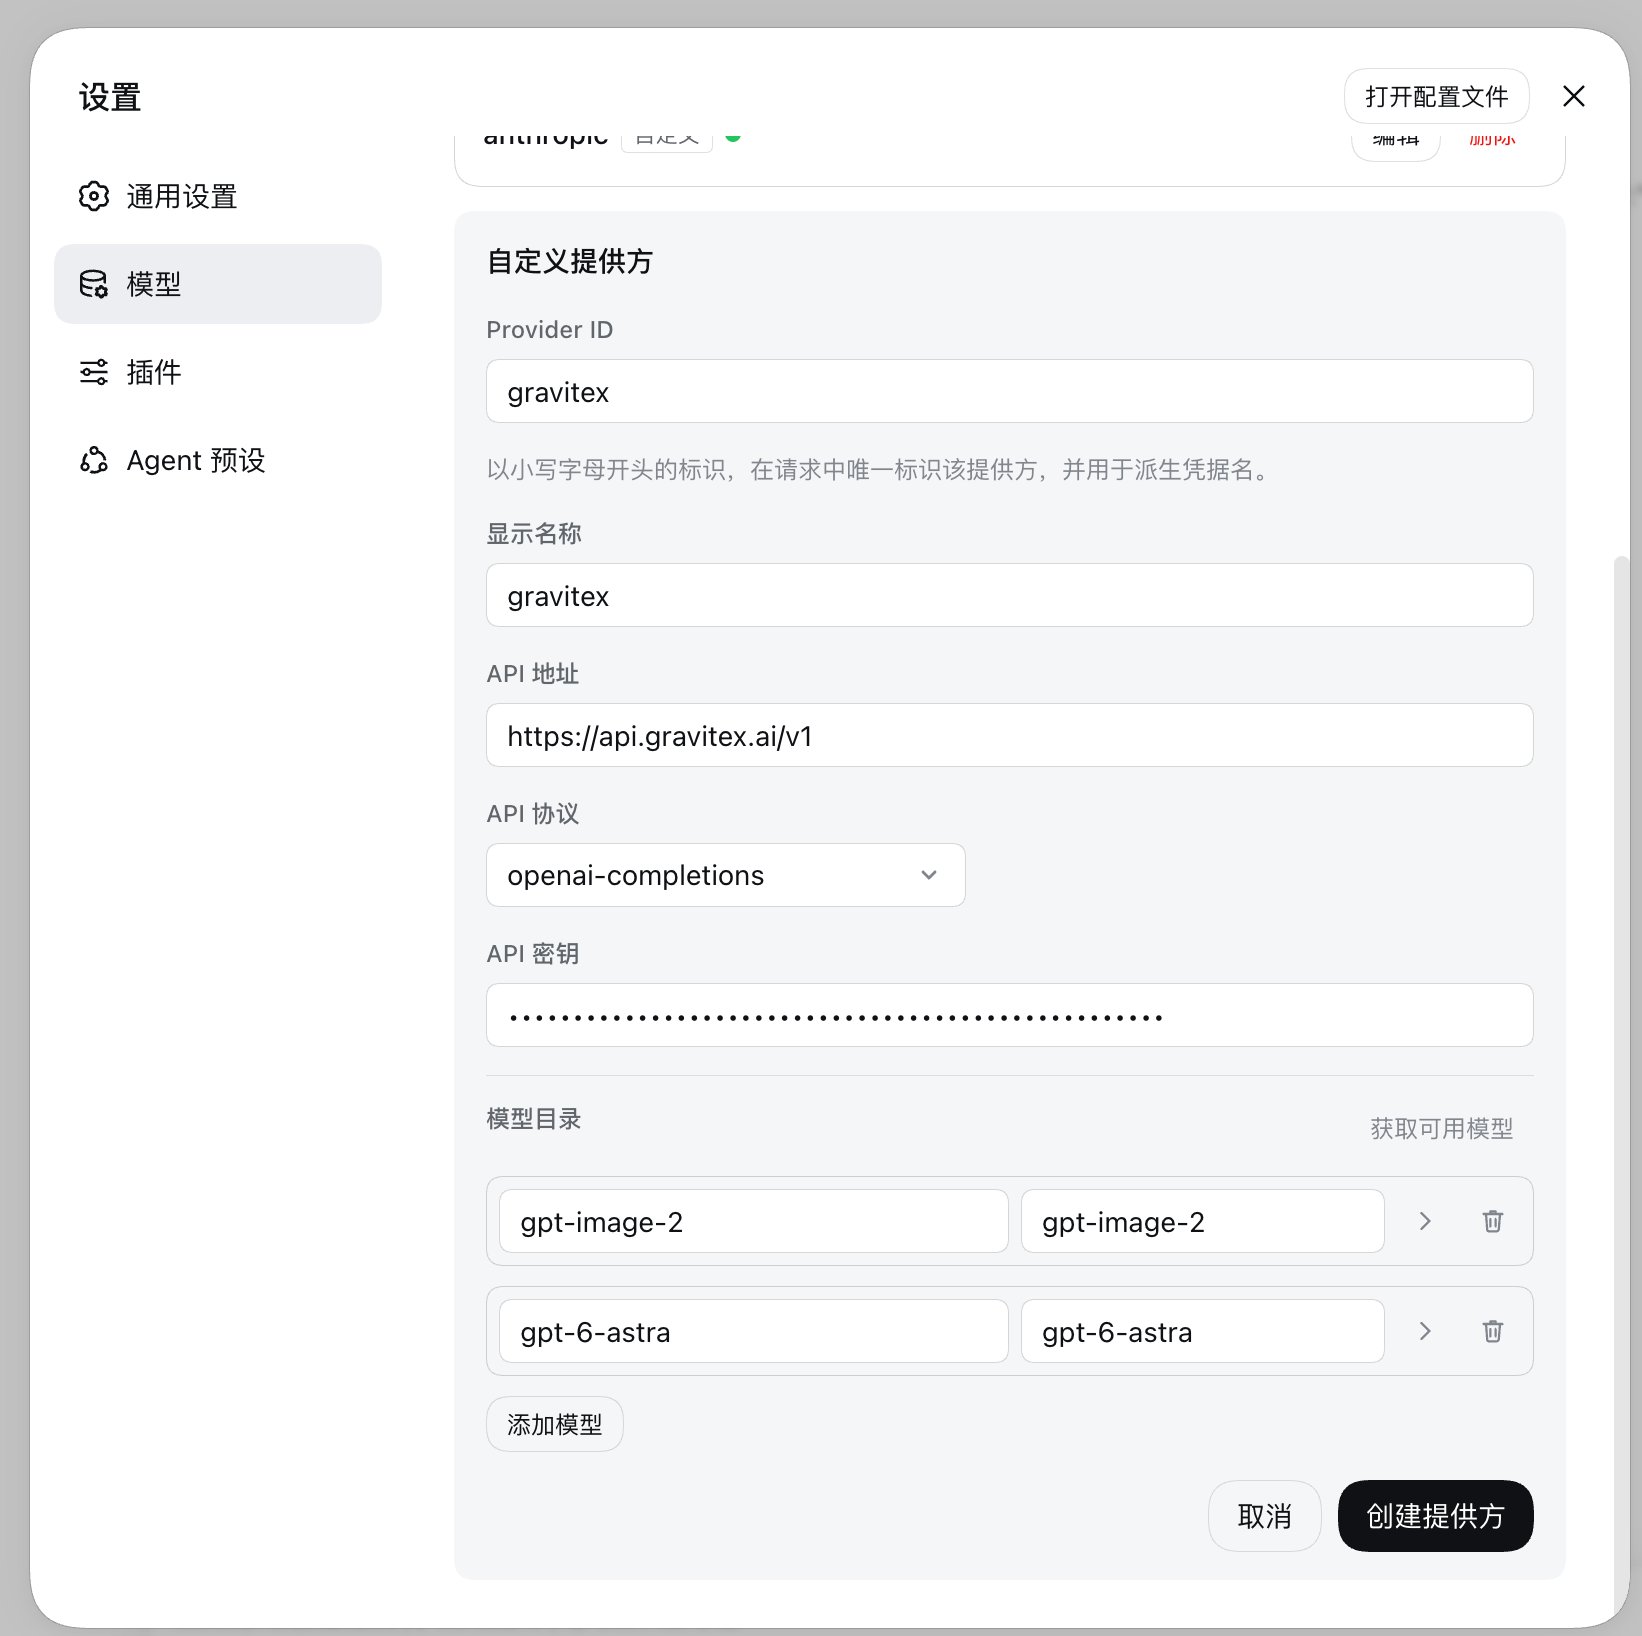
Step 4: Add models
In the provider form’s model catalog, click Fetch available models — DeepSeek Harness calls the gateway’sGET /models endpoint and lists what it offers; search, check the models you want, and click Add selected:
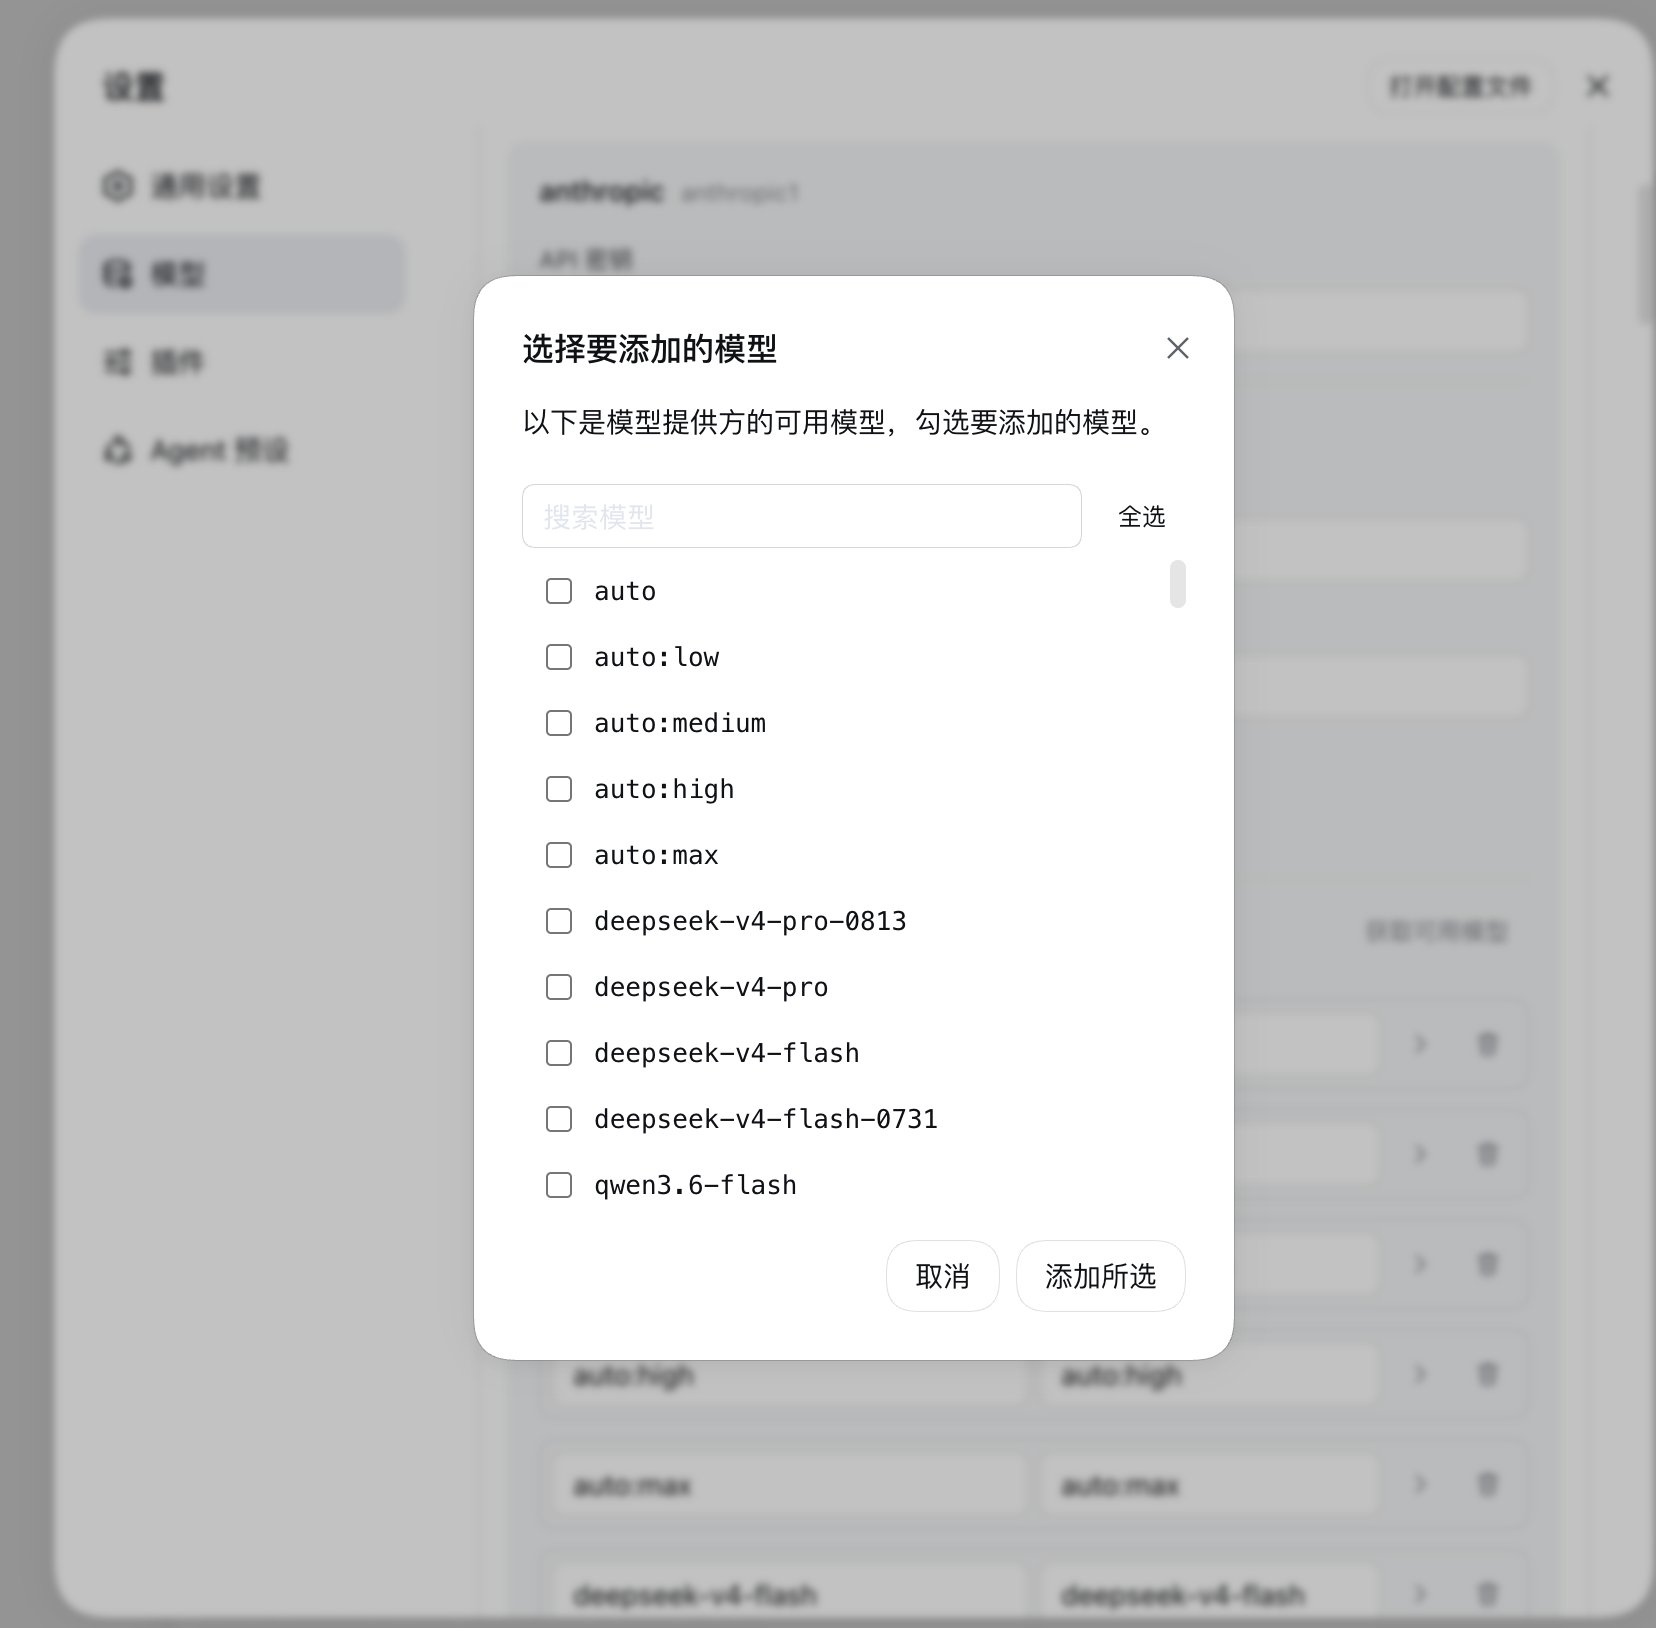
See the GravitexAI Model Plaza for the full list of model IDs.
Step 5: Select a model and start
After saving the provider, its models appear in the session’s model selector — pick one and start your task. Selecting a model also makes it the default for new sessions; model changes take effect on the next request — no restart needed: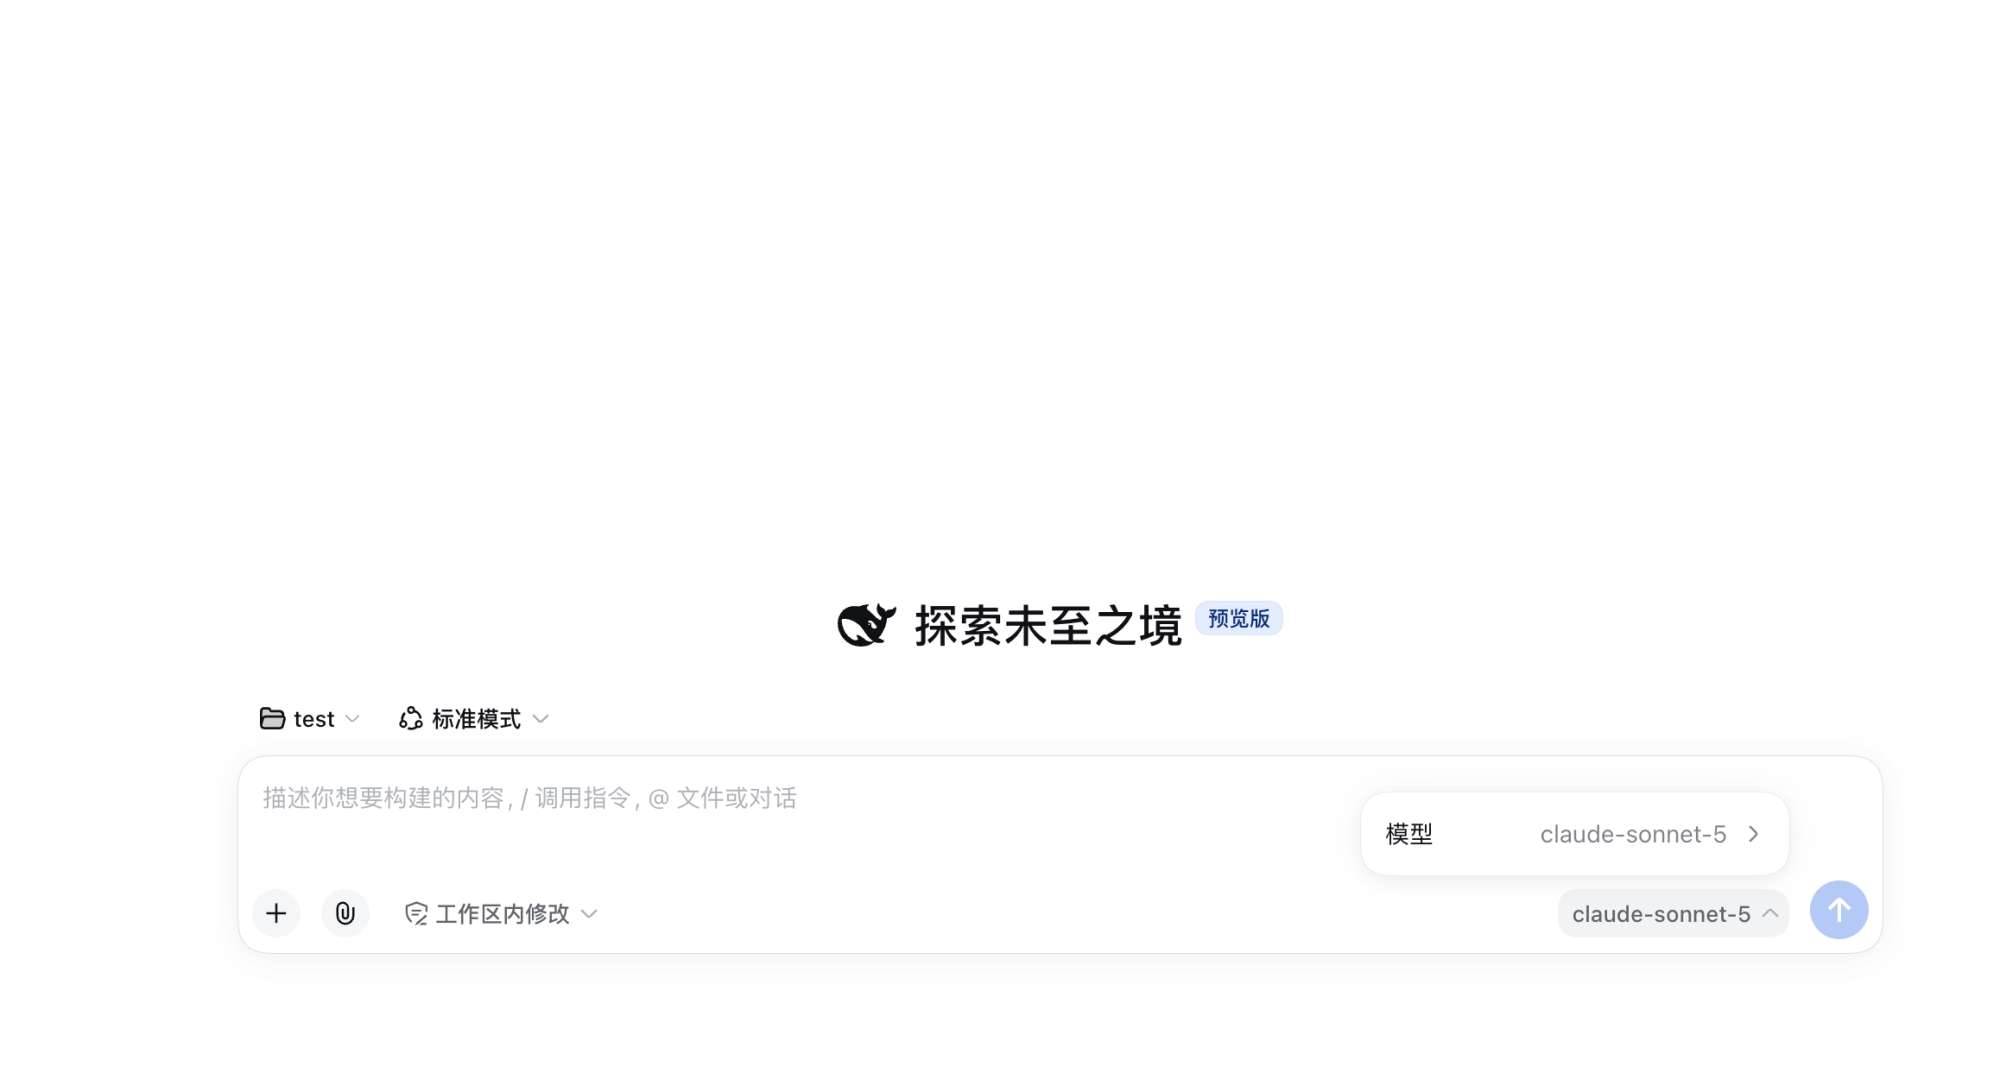
5. Feature Quick Reference
6. Advanced Configuration (Optional)
Once you’ve finished the setup above in the Web UI, you can usually skip this section. The Models page only exposes basic fields (key, endpoint, protocol, model IDs, context window, etc.). Everything else — reasoning effort, image input, request compatibility switches — is edited directly in$DSH_HOME/settings.yaml (default ~/.dsh/settings.yaml on macOS/Linux, %USERPROFILE%\.dsh\settings.yaml on Windows; when the browser and server are on the same machine, you can also click Open config file at the top of the Settings page). Changes apply on the next request — no restart needed.
About the API key: apiKeyEnv: GRAVITEX_API_KEY in the examples below means the key is read from an environment variable. Before hand-writing the config, set it in your terminal:
setx GRAVITEX_API_KEY "sk-xxxxxxxxxx" to persist it (open a new terminal afterwards); on macOS/Linux, add the export line to ~/.zshrc or ~/.bashrc.
If you already saved a provider’s key in the Web UI,
settings.yaml contains an auto-generated credential reference. When adding extra config on top of that, keep the reference as-is — do not replace it with apiKeyEnv. The apiKeyEnv style is for fully hand-written configs where the key comes from an environment variable.Complete reference configuration
Below is a completesettings.yaml example with all three providers — copy it and trim to your needs:
Field reference
The last two
compat fields can also be set at the provider level, applying to every model under that provider:
7. FAQ
How do I fix MISSING_CREDENTIAL?
How do I fix MISSING_CREDENTIAL?
The current provider resolved no credential. Check according to how you configured it: if you used the Web UI, re-save the API key on the Models page; if you hand-wrote the config with
apiKeyEnv, make sure the environment variable is set (e.g. export GRAVITEX_API_KEY="sk-...") and visible to the terminal that launches dsh. Don’t paste keys into the chat to work around it.How do I fix UNKNOWN_MODEL?
How do I fix UNKNOWN_MODEL?
The model ID isn’t recognized by the current provider. Check that the model has been added to the provider’s model list, and that its capitalization and spelling exactly match the GravitexAI Model Plaza.
GPT-family models error out or don't respond properly?
GPT-family models error out or don't respond properly?
Confirm the provider holding that model uses the
openai-responses protocol. GPT-family models cannot live under an openai-completions provider — create a separate openai-responses provider (e.g. gravitex-openai) and add the model there."Fetch available models" returns 401 or an empty list?
"Fetch available models" returns 401 or an empty list?
A 401 means the key or endpoint doesn’t match — confirm the Base URL is
https://api.gravitex.ai/v1 and the key starts with sk- with no extra spaces. If the list is empty or discovery fails, just type model IDs manually; it works identically.Key and URL are correct, but every request is rejected?
Key and URL are correct, but every request is rejected?
The gateway’s request shape differs from OpenAI’s. Set
compat.supportsDeveloperRole: false and compat.maxTokensField: max_tokens at the provider level in settings.yaml (see Section 6) and retry.DeepSeek models keep thinking even with off selected?
DeepSeek models keep thinking even with off selected?
An empty
off sends no reasoning field, so models that think by default keep thinking. Set compat.thinkingFormat: deepseek for that model (see the example in Section 6).Images are rejected before sending?
Images are rejected before sending?
Manually entered models are treated as text-only. Add
input: [text, image] to the model in settings.yaml. Conversely, if the provider rejects a request with an image, the declared capability doesn’t exist — remove image and start a new session.Can I change a Provider ID after a typo?
Can I change a Provider ID after a typo?
No. Provider IDs are permanent (requests, saved sessions, and credential references all point to them). To change one, add a new provider and delete the old. Display name, Base URL, protocol, credentials, and model list remain editable.
8. Related Resources
- DeepSeek Harness GitHub: deepseek-ai/deepseek-harness
- Official docs: deepseek-harness.github.io/deepseek-harness
- Official provider configuration guide: providers guide
- Community: GitHub Discussions / Discord
- API key management: https://maas.gravitex.ai/#/api-keys
- Model plaza: https://maas.gravitex.ai/#/api-models