> ## Documentation Index
> Fetch the complete documentation index at: https://docs.gravitex.ai/llms.txt
> Use this file to discover all available pages before exploring further.
# Kilo Code Extension (VS Code)
> Installation and configuration guide for Kilo Code for VS Code extension
## Step 1: Install Kilo Code Extension
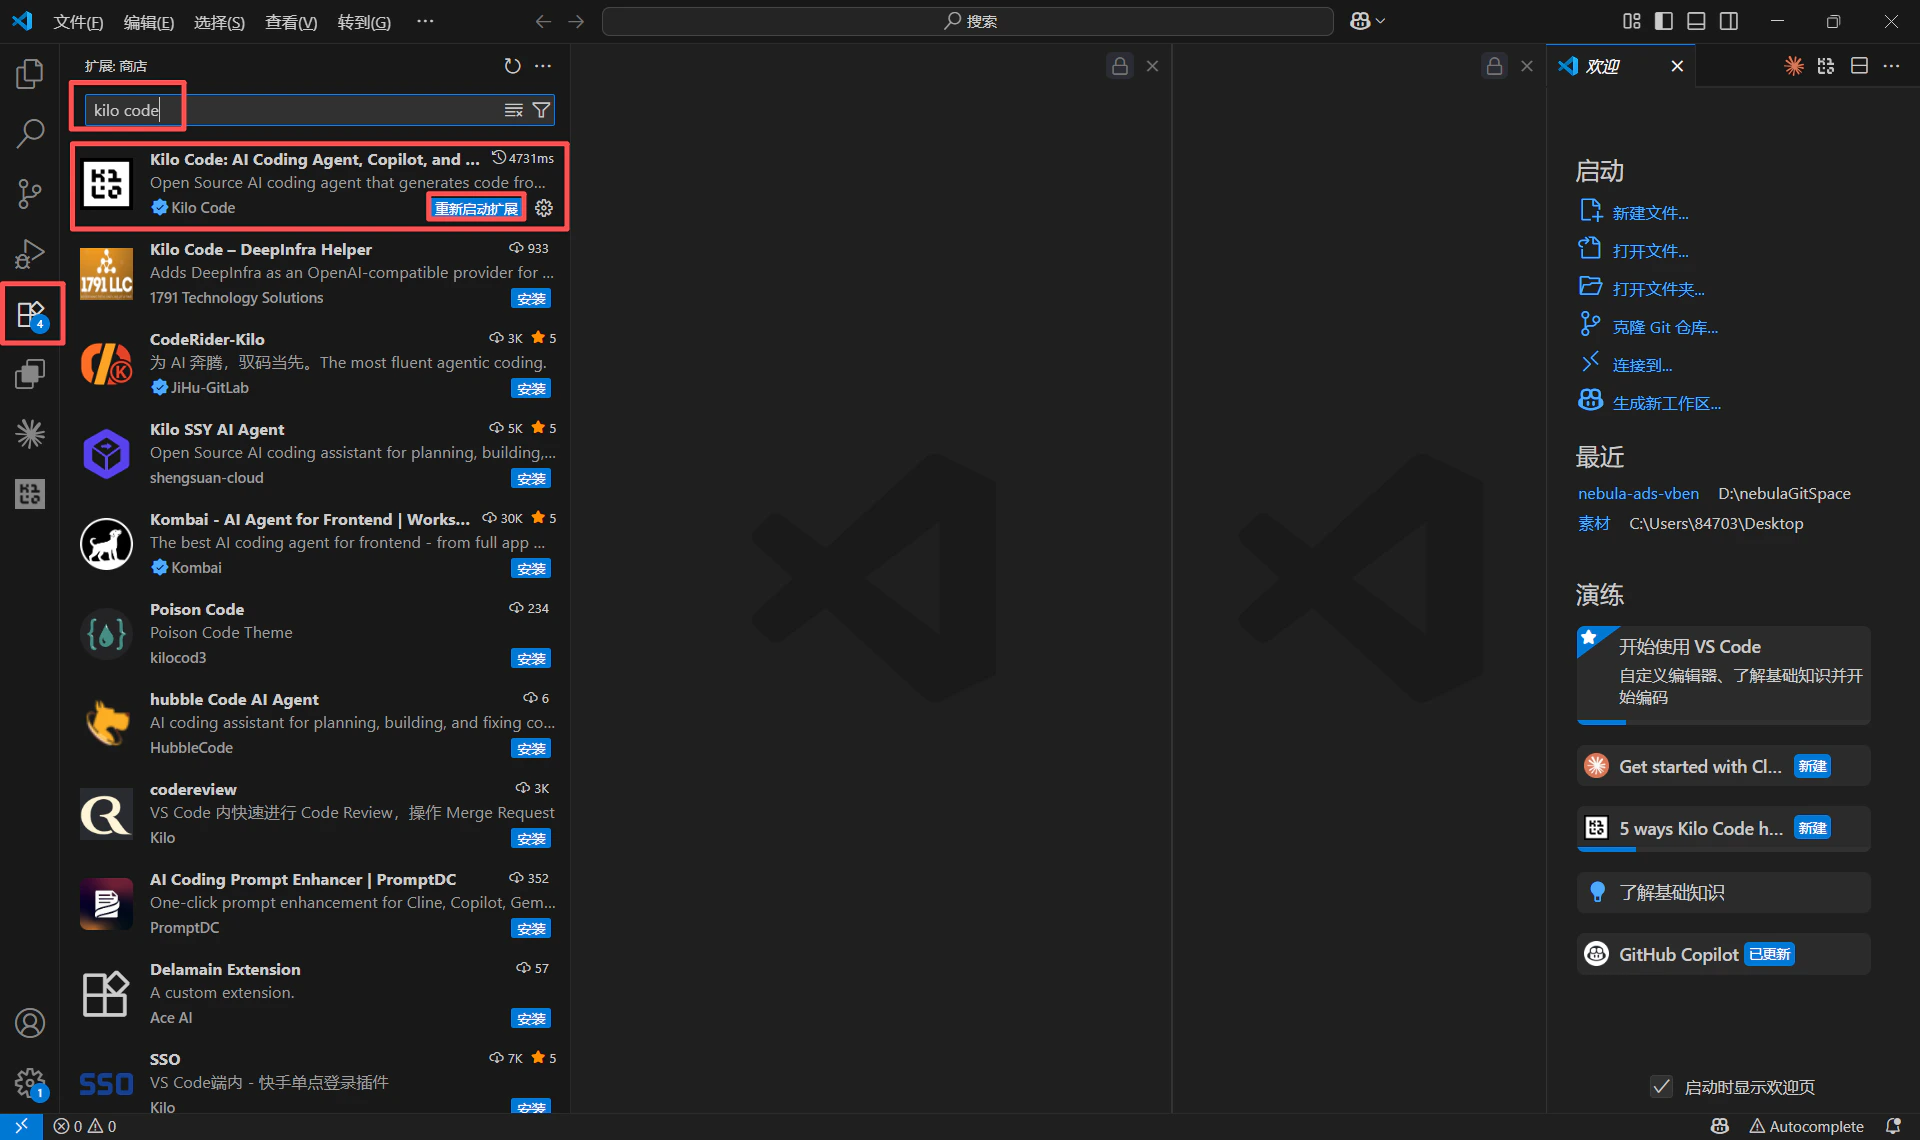
1. Open VS Code editor, go to the "Extensions" panel on the left (Shortcut: Ctrl+Shift+X).
2. Type "Kilo Code" in the search box in the Marketplace to find the official extension.
3. Click the "Install" button to complete the installation.
 ## Step 2: Configure API Provider
### 2.1 Open Settings Panel
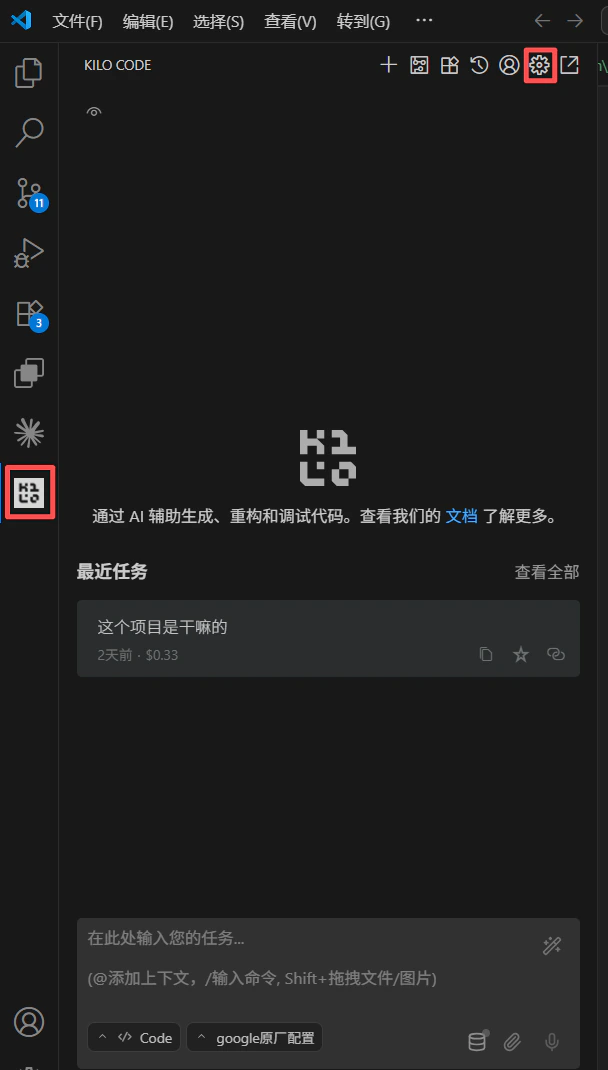
1. After installation, click the Kilo Code icon in the left activity bar to open the extension panel.
2. Click the "Settings" gear icon in the top toolbar to enter the configuration page.
## Step 2: Configure API Provider
### 2.1 Open Settings Panel
1. After installation, click the Kilo Code icon in the left activity bar to open the extension panel.
2. Click the "Settings" gear icon in the top toolbar to enter the configuration page.
 ### 2.2 Configure Custom Provider
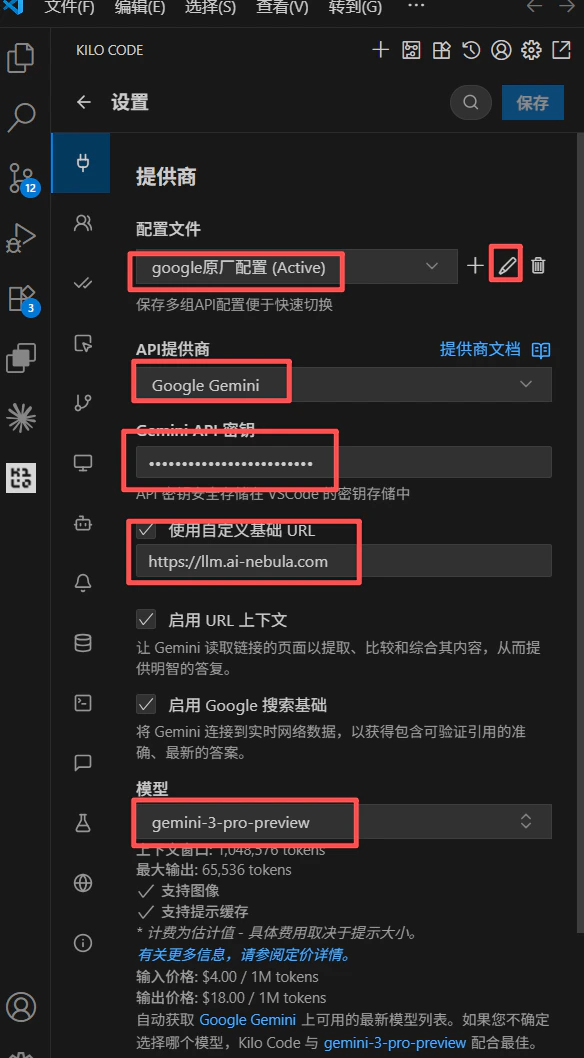
Configure the following in the "Provider" section of the settings panel:
1. **Profile**: Keep the default `default (Active)`.
2. **API Provider**: Select "Google Gemini" from the dropdown.
3. **API Key**: Enter your API key (sk-xxxxx).
4. **Model**: Enter the model name you want to use.
5. **Base URL**: Enter `https://api.gravitex.ai`.
6. **Recommended for Coding**: `gemini-3-pro-preview`.
### 2.2 Configure Custom Provider
Configure the following in the "Provider" section of the settings panel:
1. **Profile**: Keep the default `default (Active)`.
2. **API Provider**: Select "Google Gemini" from the dropdown.
3. **API Key**: Enter your API key (sk-xxxxx).
4. **Model**: Enter the model name you want to use.
5. **Base URL**: Enter `https://api.gravitex.ai`.
6. **Recommended for Coding**: `gemini-3-pro-preview`.
 ## Step 3: Verify Connection
1. After configuration, open any code file.
2. Select a piece of code or place the cursor in an empty area, then click the Kilo Code icon or use the shortcut `Ctrl+I` (Windows) or `Cmd+I` (macOS) to open the **Inline Chat** input box.
3. Enter a test message (e.g., "Explain this code" or "Hello"). If you receive a response, the configuration is successful.
## Step 3: Verify Connection
1. After configuration, open any code file.
2. Select a piece of code or place the cursor in an empty area, then click the Kilo Code icon or use the shortcut `Ctrl+I` (Windows) or `Cmd+I` (macOS) to open the **Inline Chat** input box.
3. Enter a test message (e.g., "Explain this code" or "Hello"). If you receive a response, the configuration is successful.